HuggingFace. Qdrant. Streamlit. Llama 2. Buzzwords baby
WHAT IS THIS⌗
I have been tinkering with different large language models and vector dbs recently for some client work and some personal projects. Recently, I started working with Llama 2 in order to stop relying on the elephant in the room (OpenAI). The following case study is basically a quick start on working with Llama 2 and semantic search as well. Read on if you aren’t bored at this point.
First, the model
Okay so most of you reading this are probably already familiar with GPT4 and 3.5 turbo. You probably are also familiar with the billing associated with these models. While not insane for personal projects, if you’re looking to get anything LLM based into production, you should probably at least attempt to do so without having to pay a tithe to Sam Altman every time your user has a question. This is where Llama comes in. Developed at Meta, Llama and its younger (and more powerful) brother Llama 2 are some of the leading open source large language models. Rare Zuck W. Anyway, being open source means that these models can be run locally and deployed on your chosen infrastruture, as opposed to the OpenAI APIs.
How is this done? Well, you can use HuggingFace (and request model access from Meta), or you can use an awesome tool like Ollama (note: I have zero affiliation with them, they just have a great tool). Ollama allows you to run Llama 2 and other models using Docker or your local machine’s native capabilites (MacOS and Linux). It’s as simple as downloading the app, model, and then running a couple commands on your terminal.
1. Download Ollama (https://ollama.ai/download)
2. Choose a model (Llama 2, Llama 2 uncensored, or even a variant) NOTE: Be conscious of your machine's capabilites and the models spec requirements i.e. the 7b model generally requires at least 8GB of RAM, etc
3a. Interact on the CLI directly by running "ollama run llama2" in your terminal
                            or
3b. Call it like you would an API in your app or program (you will see how I did it further below)
Second, the database (and the data i guess)
At this point, we’ve got our local model set up and running. Our next step is getting our database sorted and the data inserted. This is where things start picking up a bit in complexity.
First, what even is a vector db? If you aren’t familiar, a vector database is used for storing data in the vector format (simple enough so far). What’s a vector? While that can be whole article in of itself, at a high-level, a vector is basically a list of numbers that represents an object (like a word, image, etc) as a point in multi-dimensional space. For example, the word “cat” could be represented as [0.1, 0.3, 0.8] in a 3D vector space. A vector can be used to capture semantic meaning and relationships in data (aka embeddings). A vector db then is a specialized database optimized for storing and querying large collections of vectors/embeddings. They allow fast similarity searches to find vectors close to a query vector in the semantic embedding space. This enables applications like recommender systems which retrieve items similar to a user’s interests.
If you’re interested in learning about this component in more details, I highly recommend the following resources:
-
Vicki Boykis' “What are embeddings” book, https://vickiboykis.com/what_are_embeddings/about.html.
-
Prashanth Rao’s “Vector Databases” series, https://thedataquarry.com/posts/vector-db-1/
In this particular case, I decided to work with Qdrant’s Vector DB, https://qdrant.tech/. The resources above go into more details regarding the pros and cons of some of the major vector dbs out there, but to keep it short for this piece, I basically chose it because it is one of the newer ones on the scene, it was written in Rust, it isn’t postgres, and it works locally using Docker.
With that said, assuming you have Docker itself already set up, here’s how to get Qdrant up locally:
1. Run 'docker pull qdrant/qdrant in your terminal'
2. Run 'docker run -p 6333:6333 \
-v $(pwd)/qdrant_storage:/qdrant/storage:z \
qdrant/qdrant'
in your terminal
3. You should now be able to see the db UI at localhost:6333/dashboard and you'll be interfacing with it programatically at localhost:6333
Okay so DB is stood up and sorted at this point. The other thing I want to briefly discuss in this section is the data and the scenario this case study presents. I found an Amazon products data set on Kaggle in a .csv format. Given this data, this use case is sort of assuming an e-commerce scenario, where some entity has a product catalog that users may want to search through or ask questions about. I included the data set in the project repo (https://github.com/dverasc/semantic-search-app.), but you can also find it on Kaggle here, https://www.kaggle.com/datasets/promptcloud/amazon-product-dataset-2020/.
Third, the thing
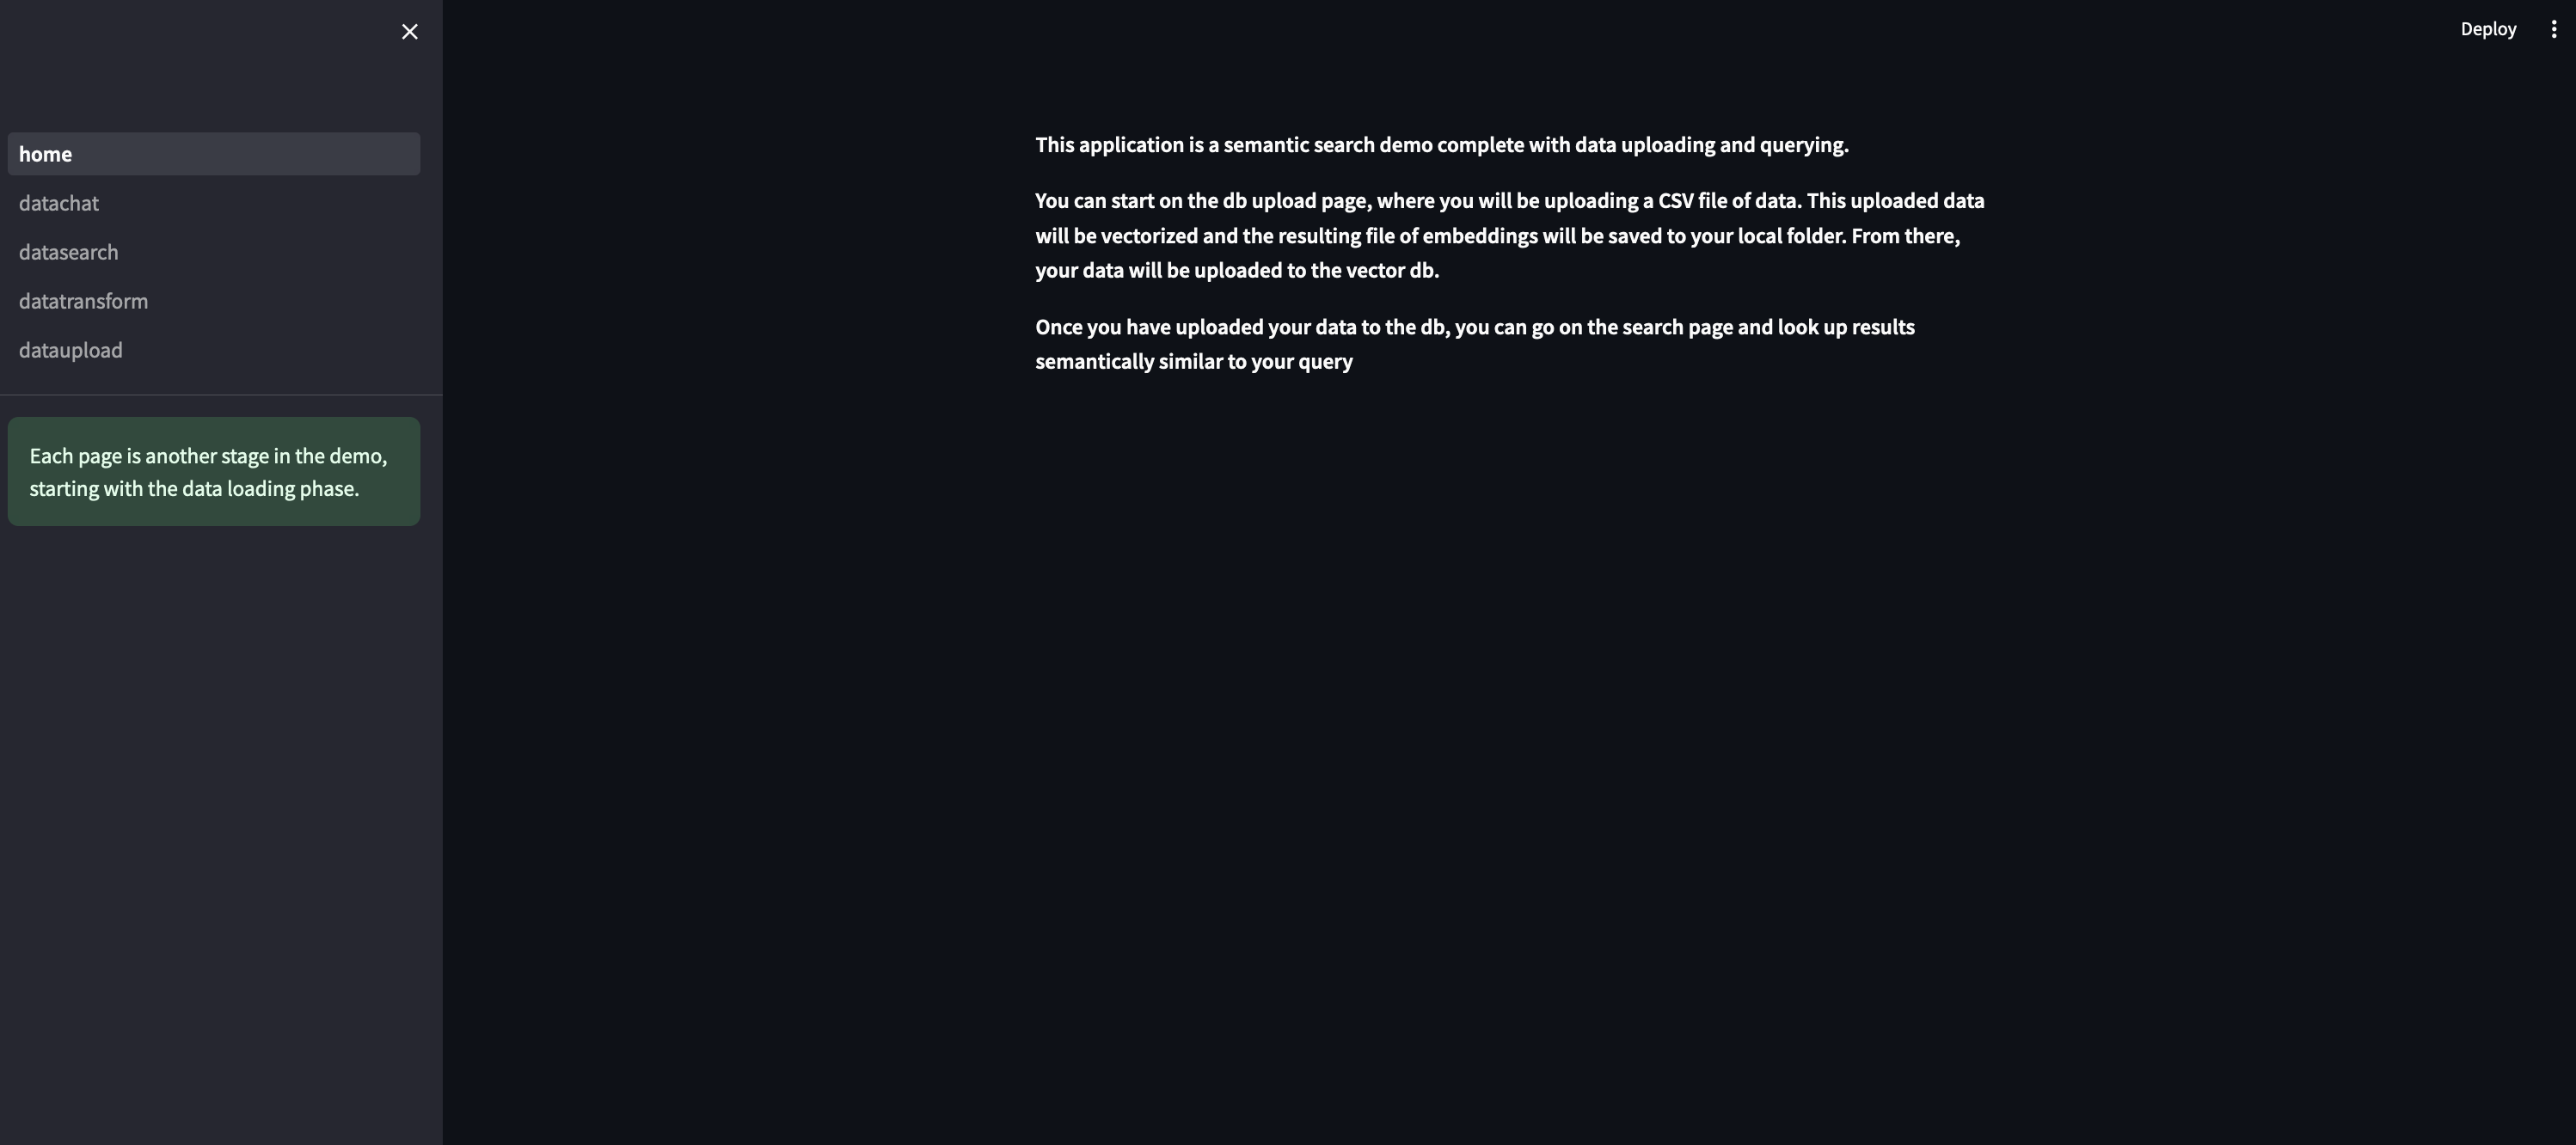
The thing here is an application layer + a couple different features that I added to it. The application will be done with Streamlit (shocker I know) and the features are basically some basic CRUD + semantic search and chat using the model and db running locally (see earlier sections).
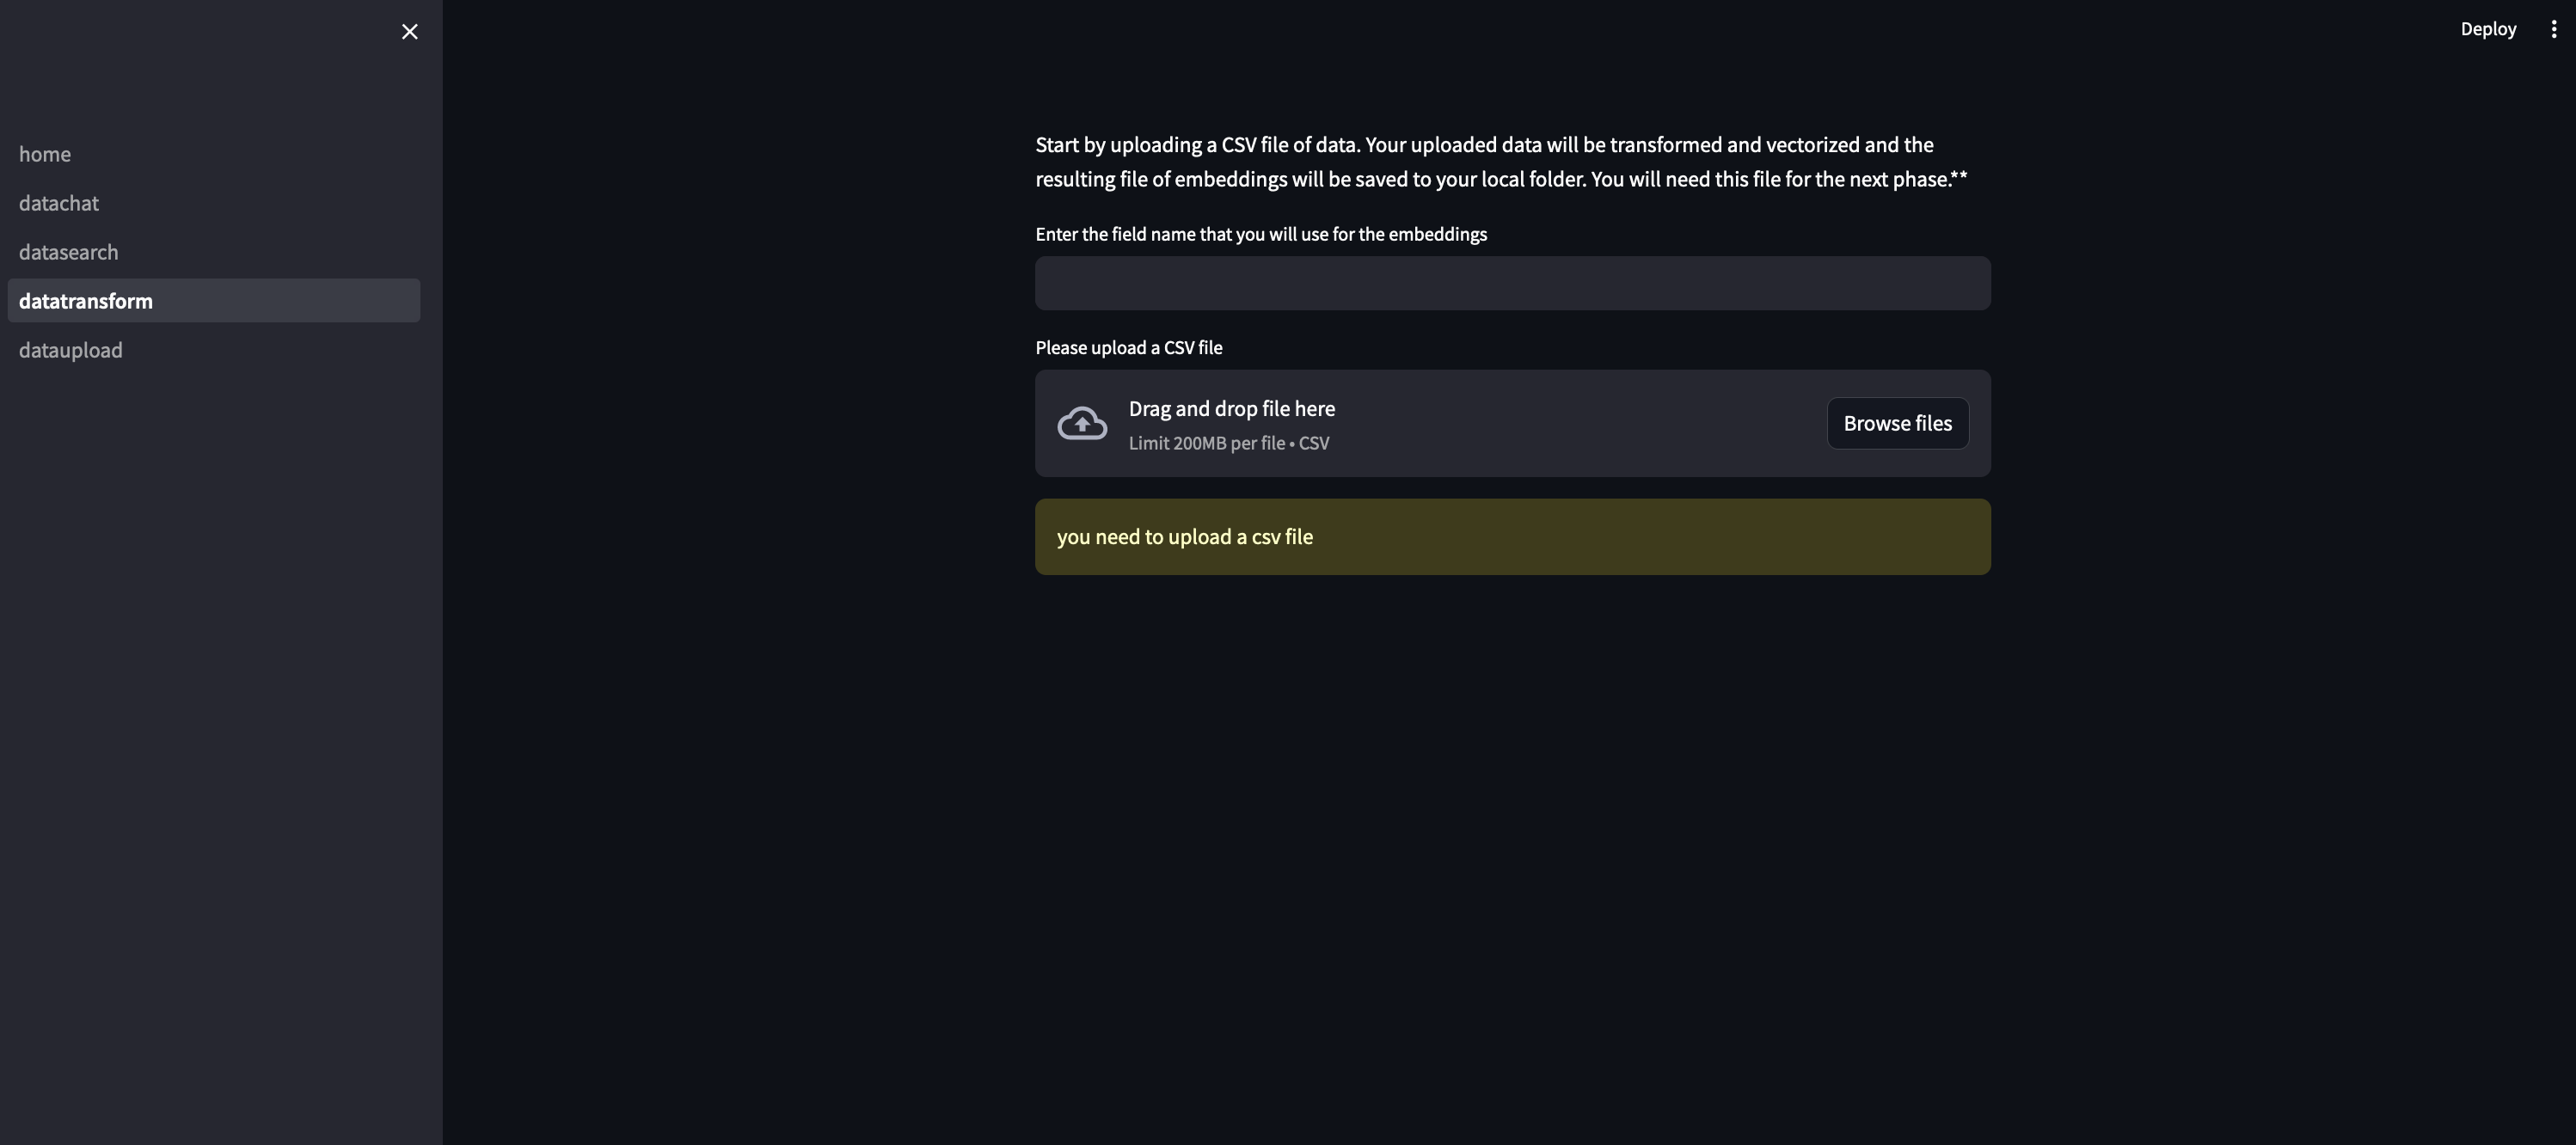
First, let’s get the application started with creating some data. In this case, we will be uploading CSV files and turning that data into vectors, before uploading those to the vector database.
This post will show the snippets of code, but if you’re trying to replicate this demo like for like, check out the actual Github repo to see the full source code. With that said, here’s how we start the application.
This first snippet shows you how to set up the streamlit multipage app:
Each phase of this process (data transformation, data upload to db, and then search and chat) has its own dedicated page within this app.
This second snippet shows you how we handle our data transformation. At this stage, we are turning our CSV file data into vectors using the HuggingFace Sentence transformer, which is one of the more popular (and open source) models to create embeddings. This process requires us to chunk the data in the csv file, encode our data, then turn that encoding into a numpy array and saving that into a .npy file. You will need this file for the next stage.
Anyway, the code for that step looks something like:
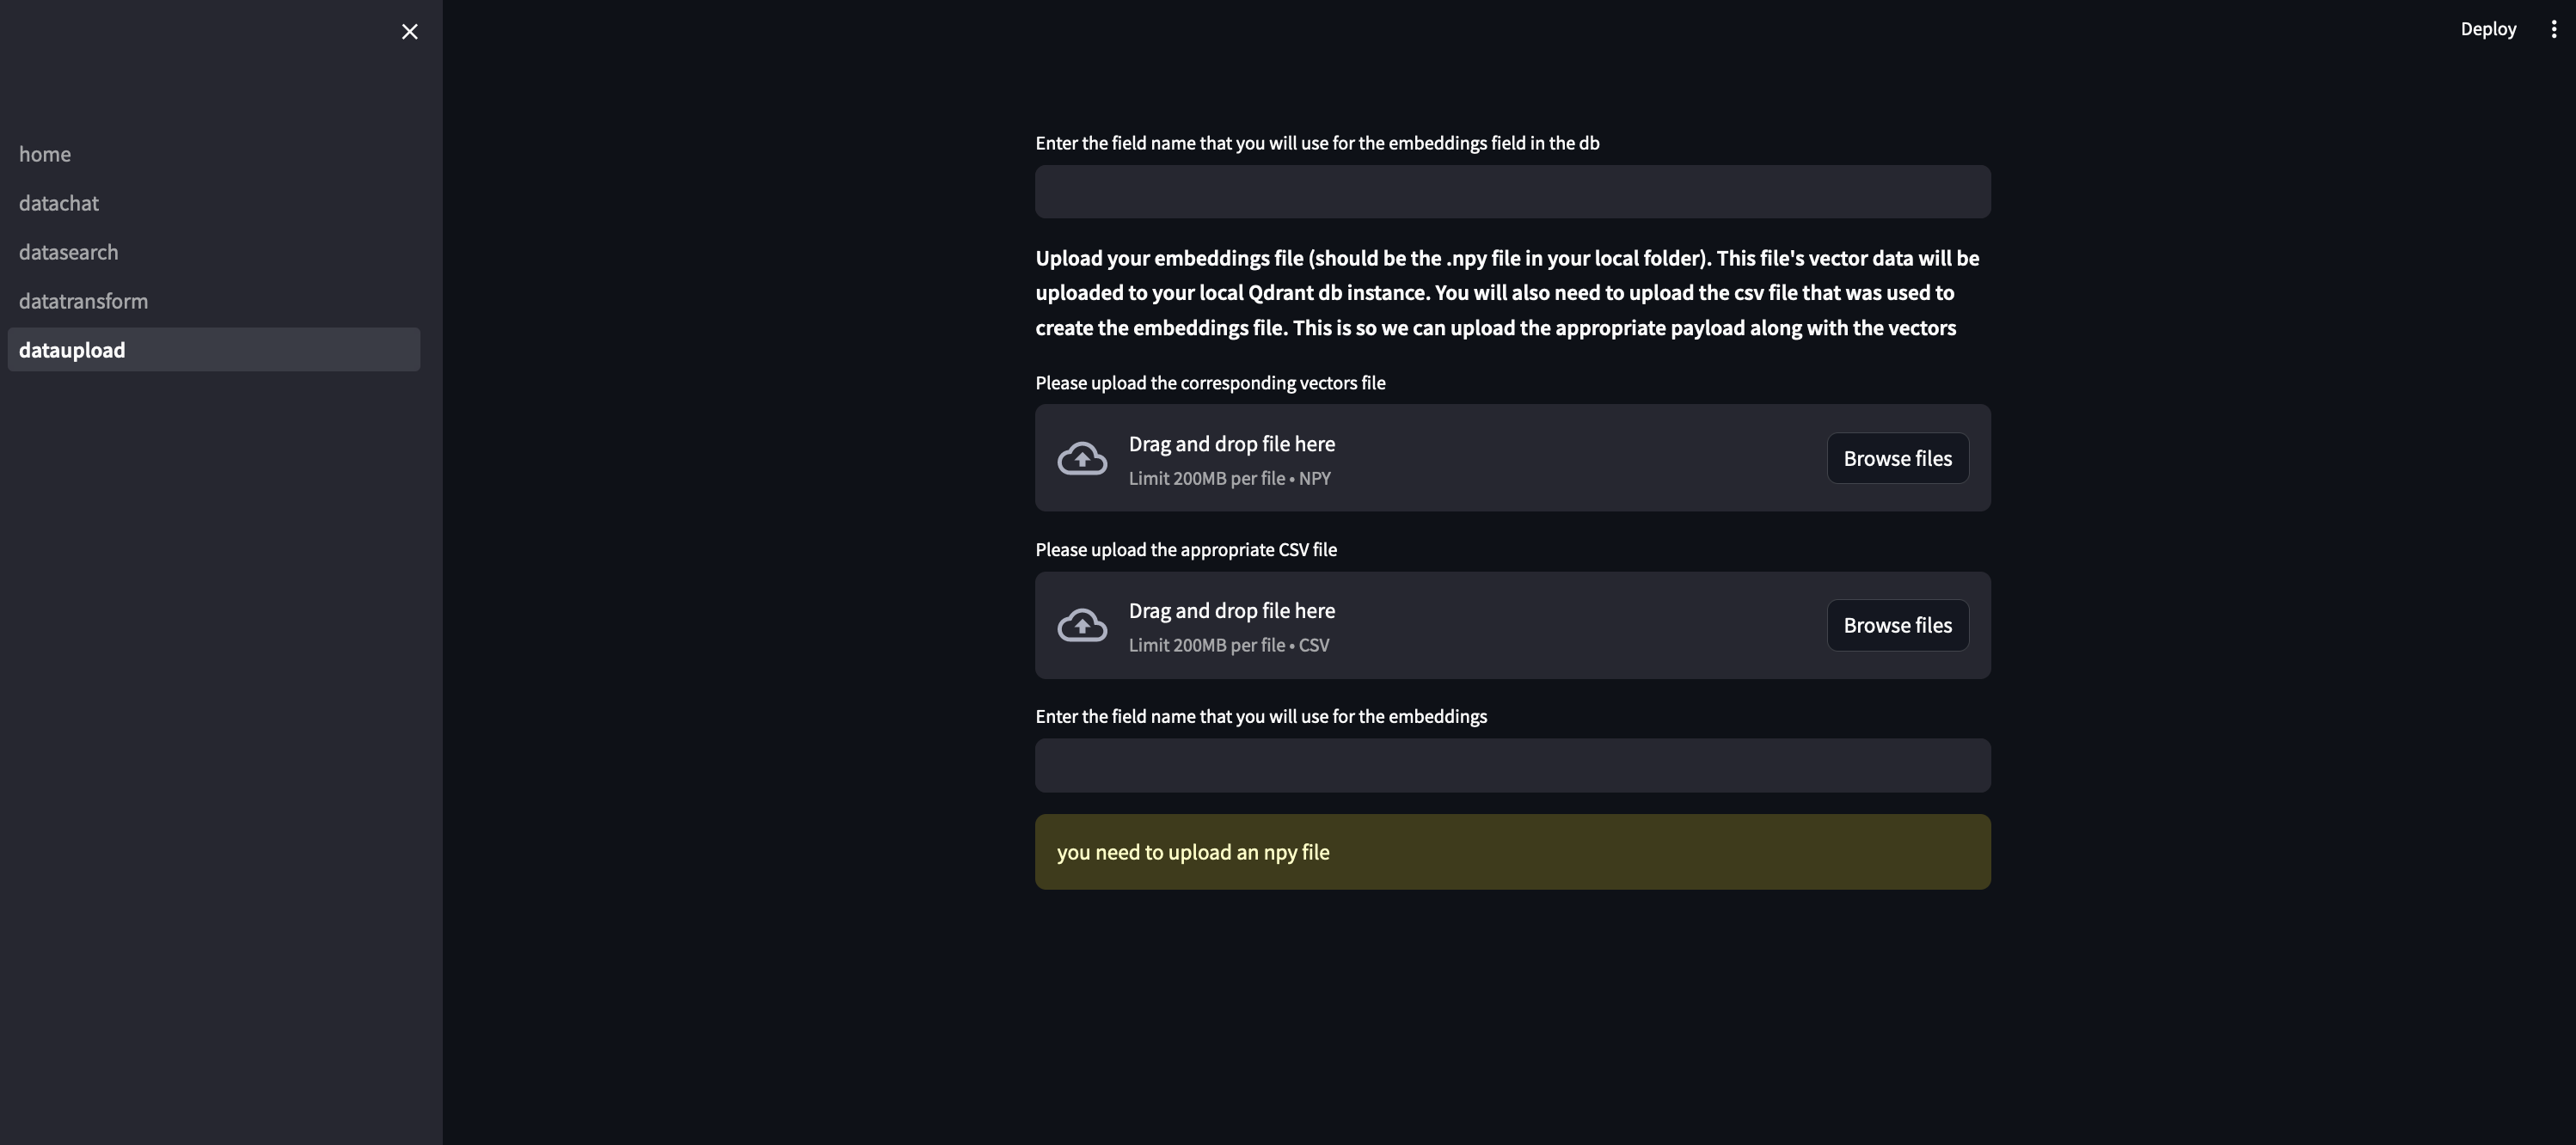
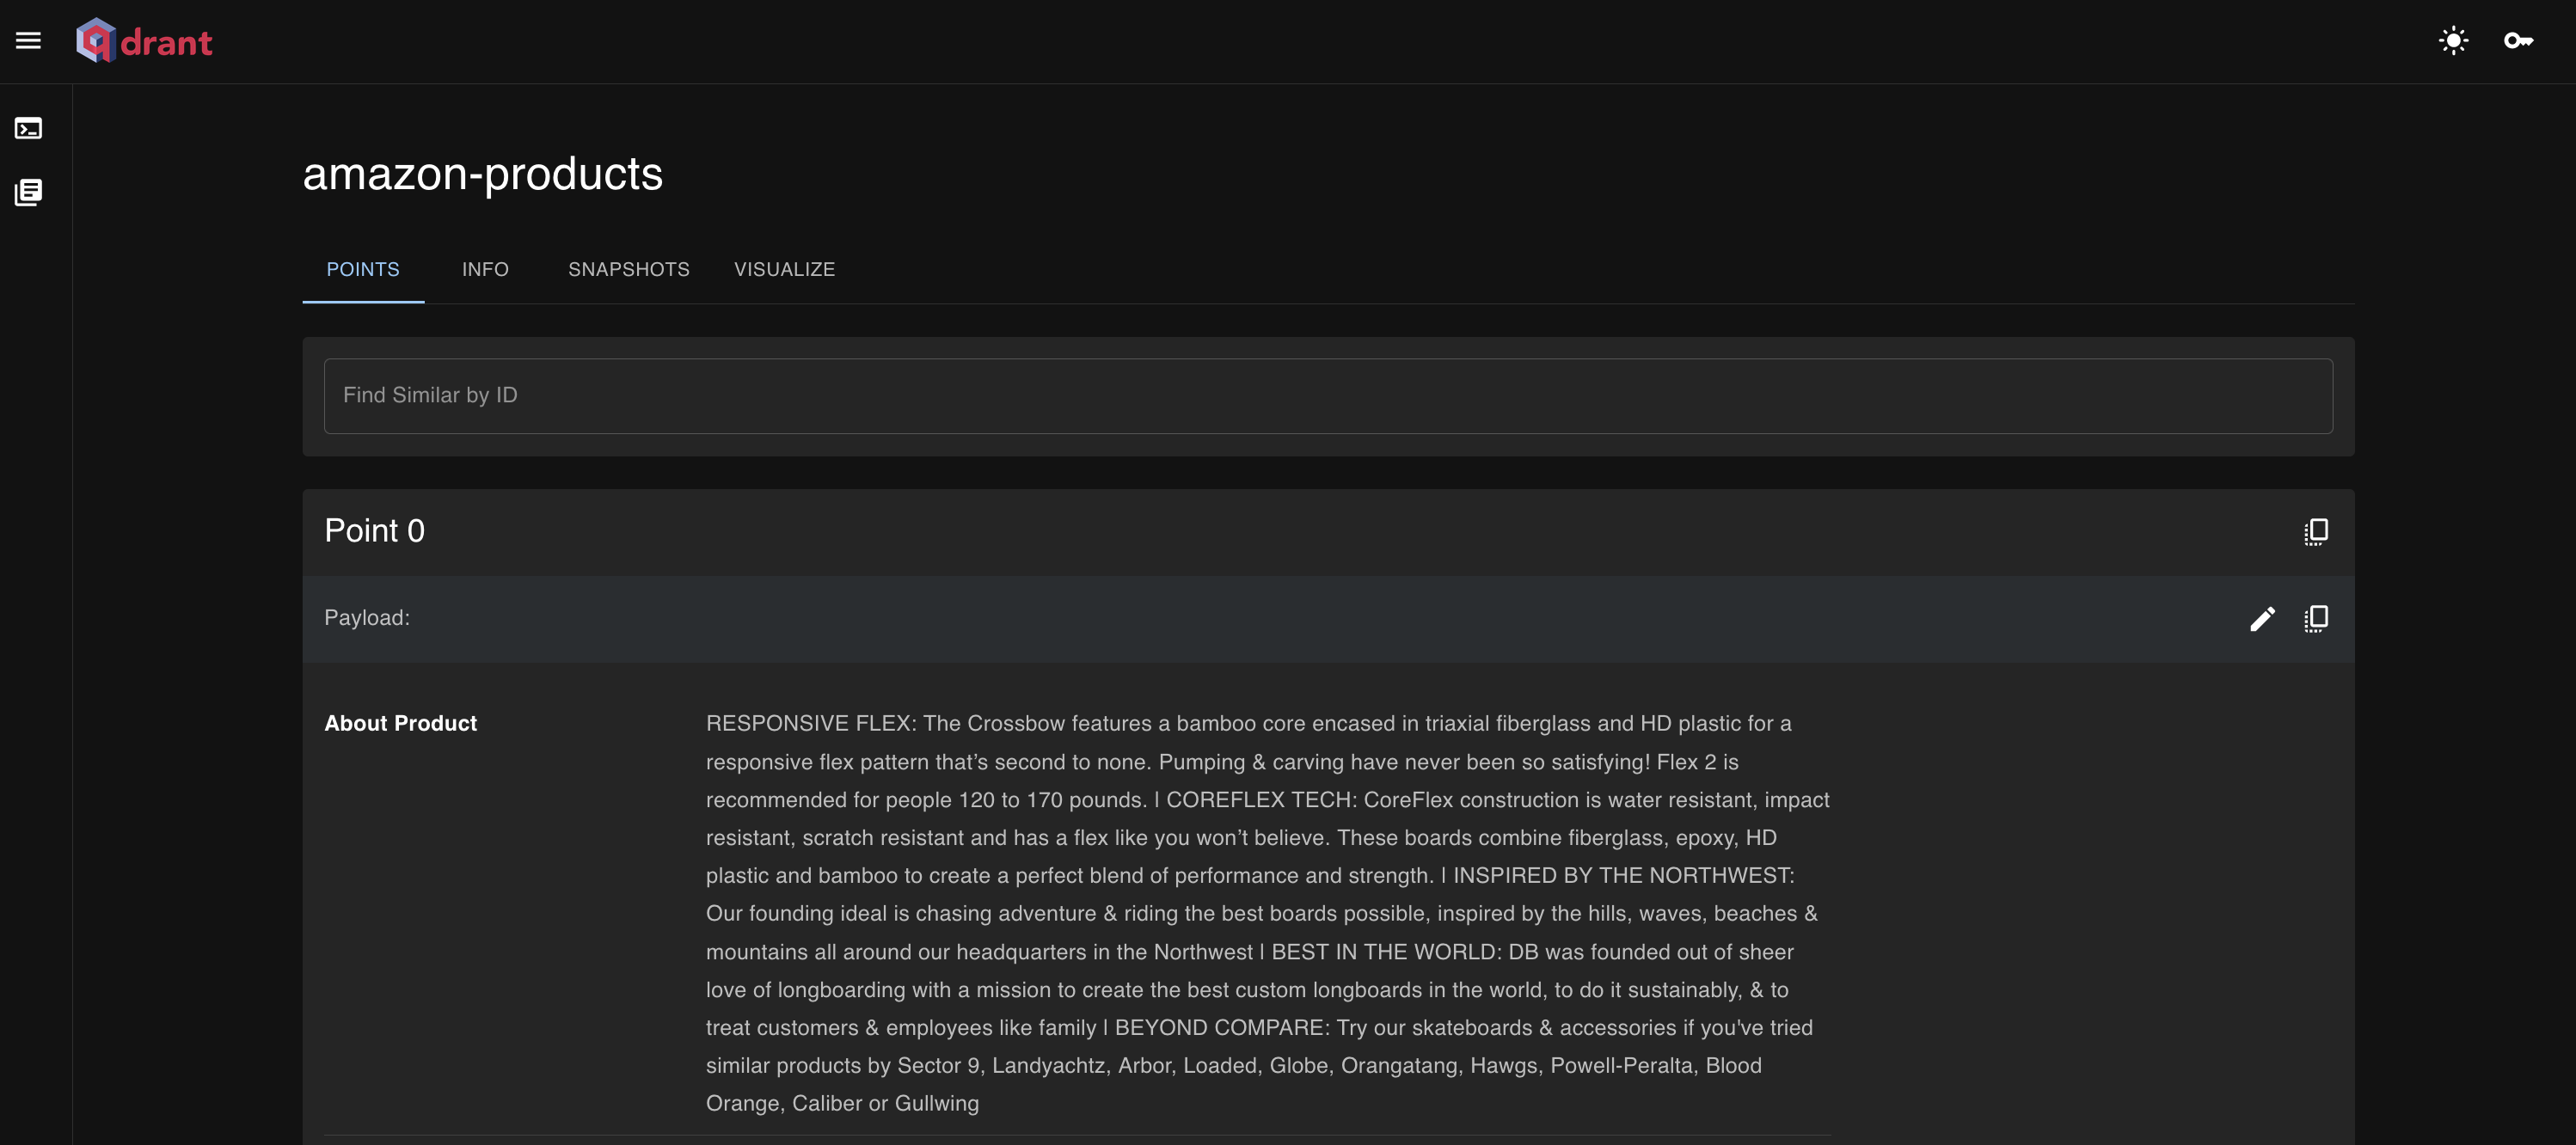
After encoding our data and saving it to a .npy file, we need to upload this data into our vector db. If you remember, this case study uses Qdrant as the db. Qdrant supports the use of payloads, which is basically json content that represents any additional information we want to store along with vectors. So at this point in the process, we are looking to submit the vector data and associated payload data to Qdrant. To this, we need to first create the collection, then submit the data.
The code for that bit is:
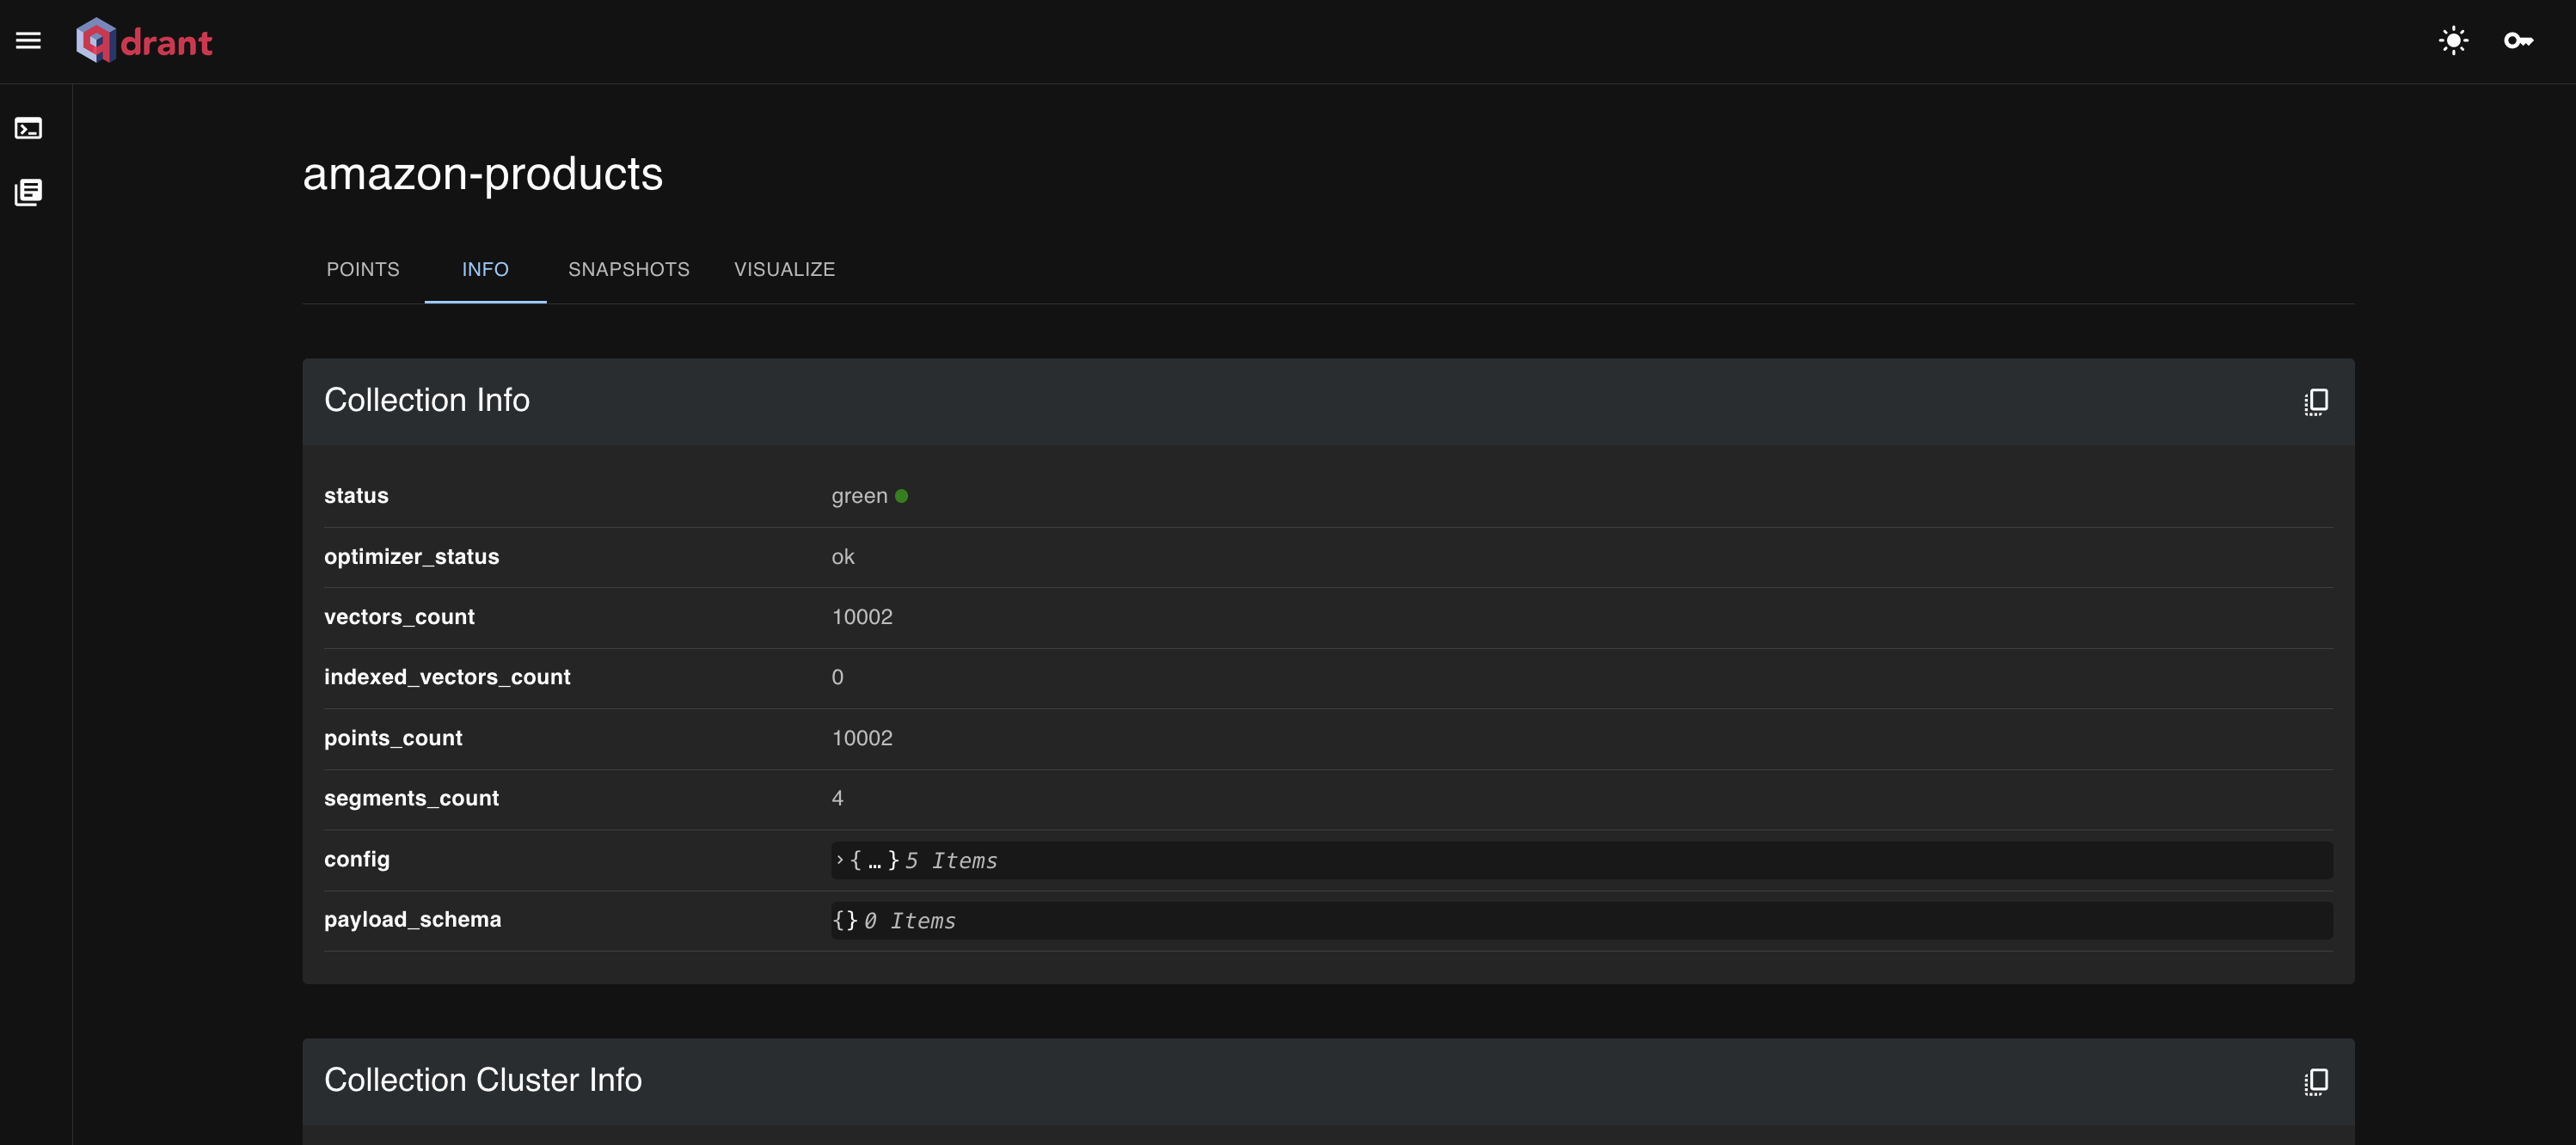
And after running this step, we can navigate to the db UI and see our collection of data:
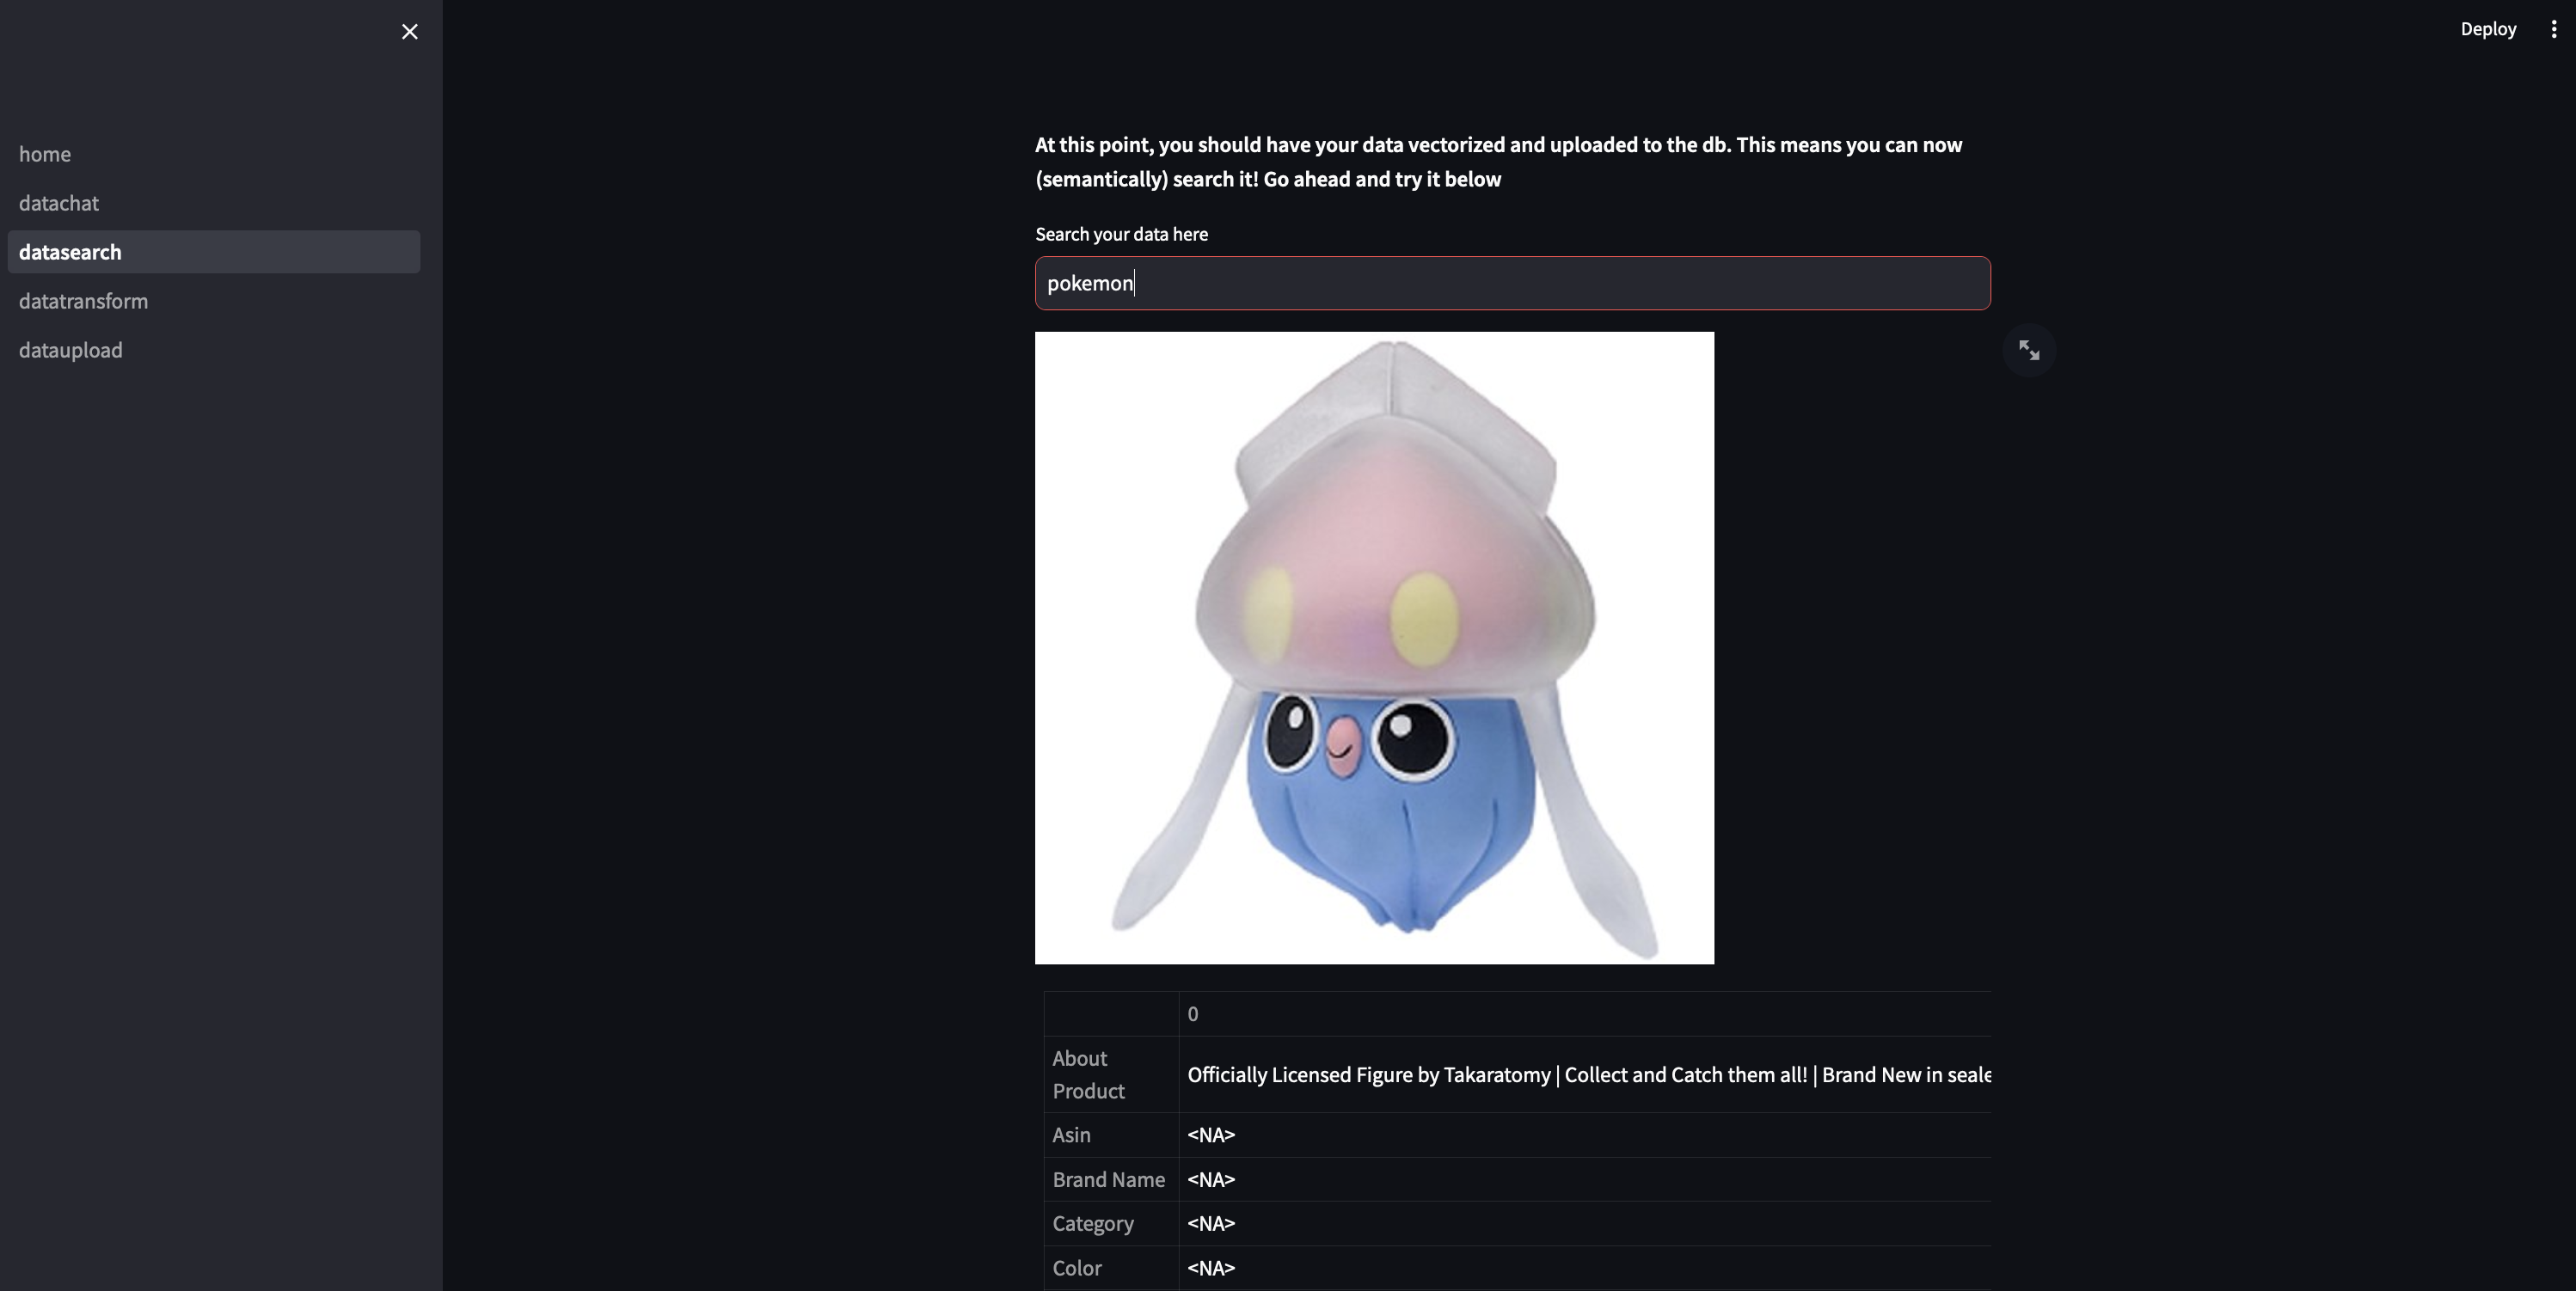
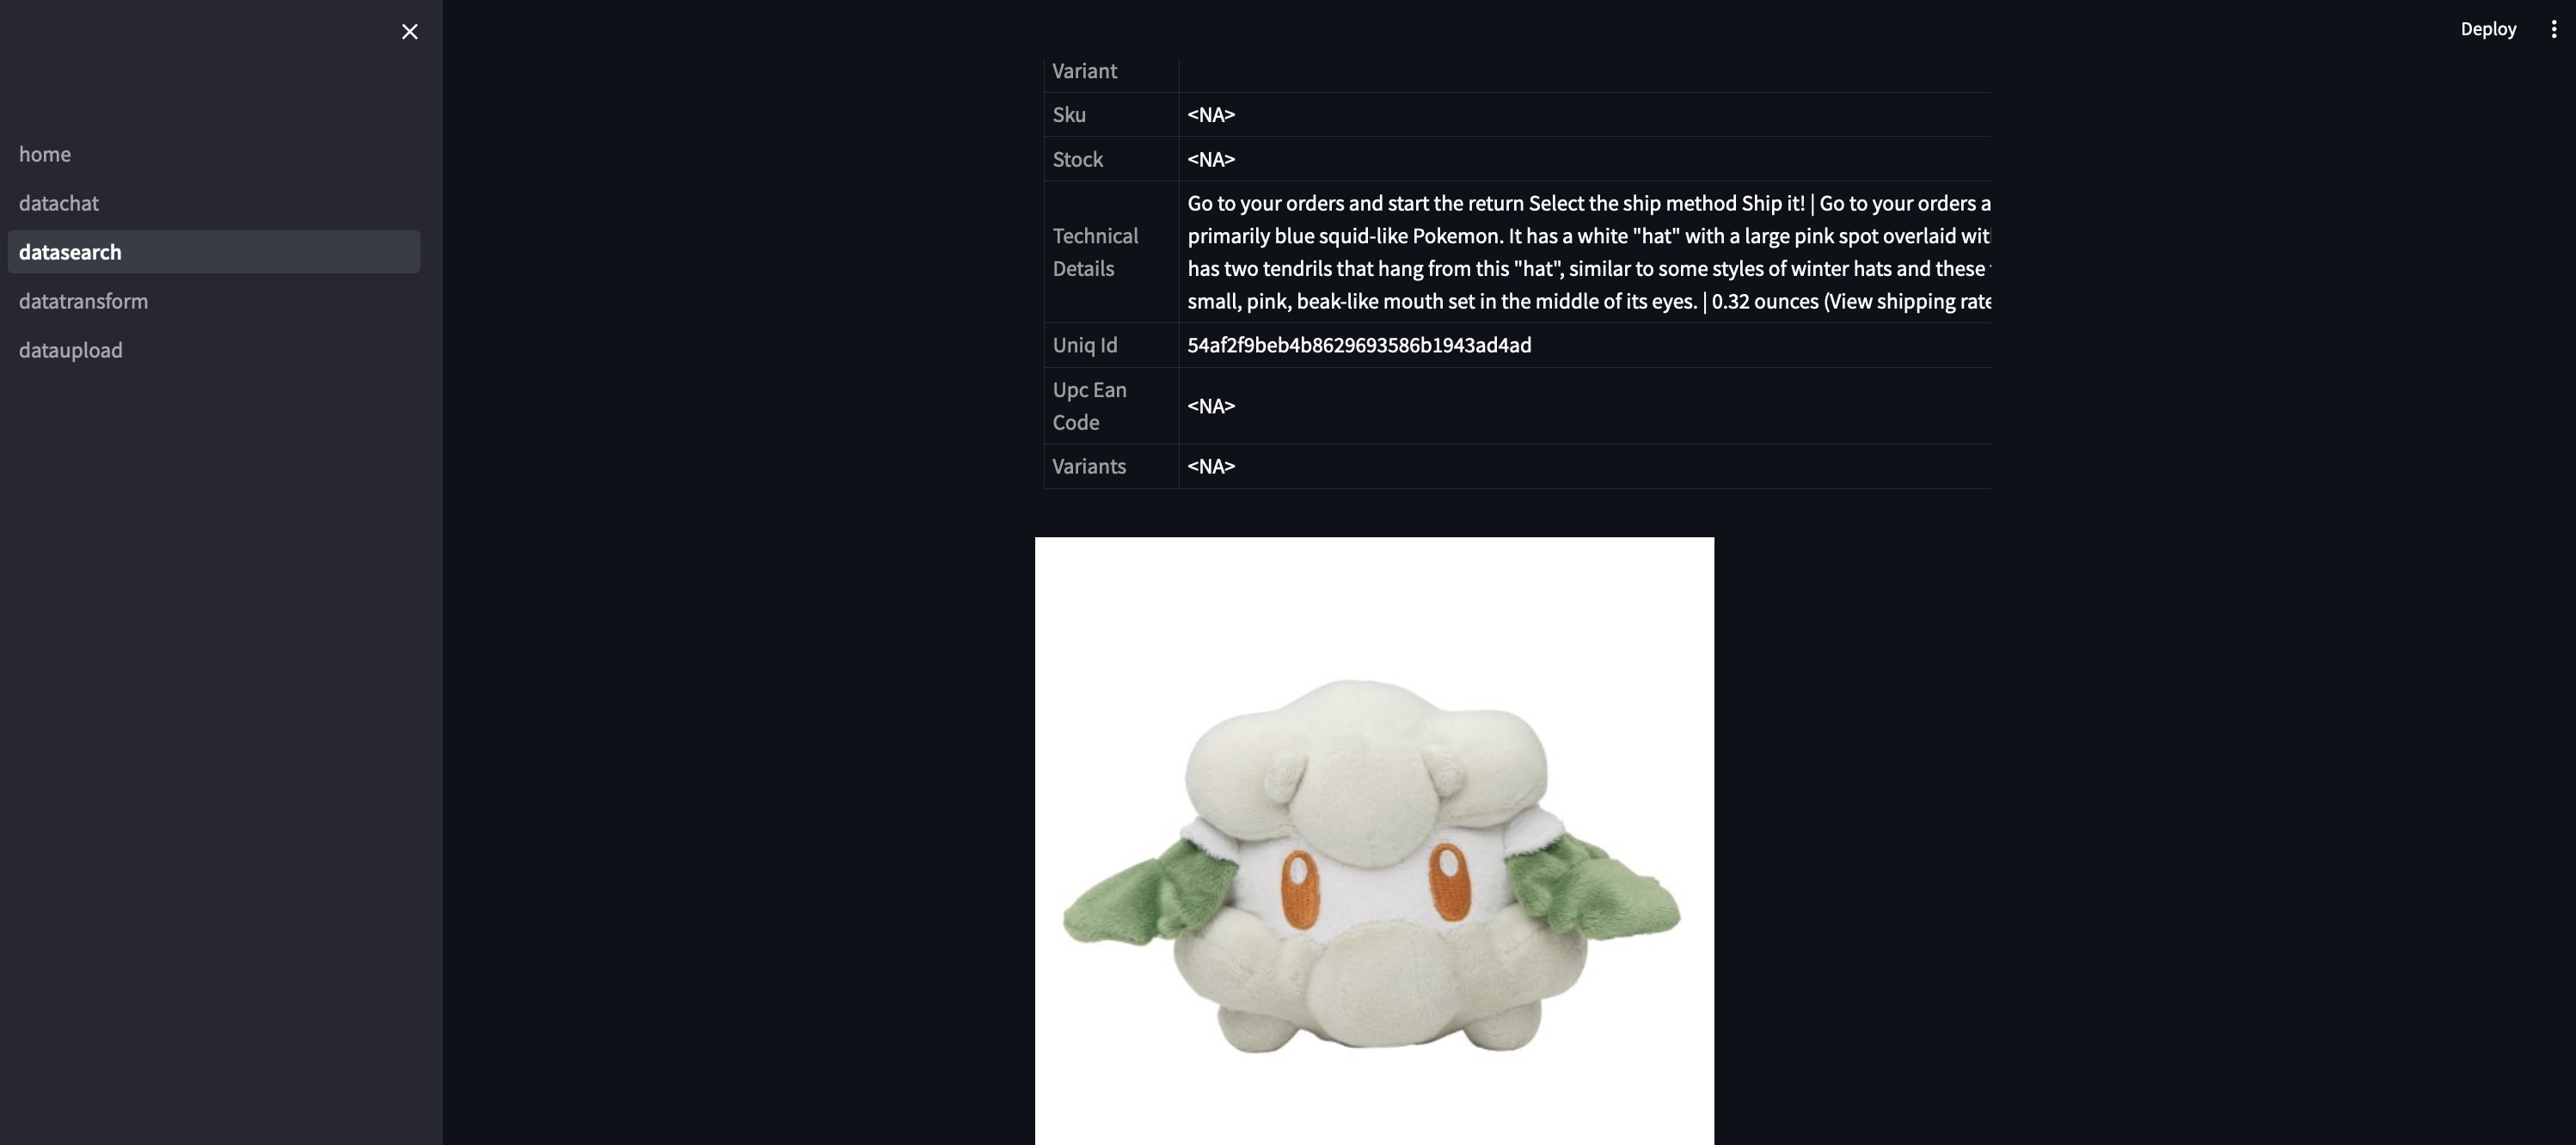
Now is where the fun starts. At this point, we’ve got our data properly formatted and transformed to vectors, which are stored in our local Qdrant db instance. With that set up, we can run semantic searches on the data as well as chat over it with a LLM running locally.
The search results are displayed on the streamlit app along with their respective payload data:
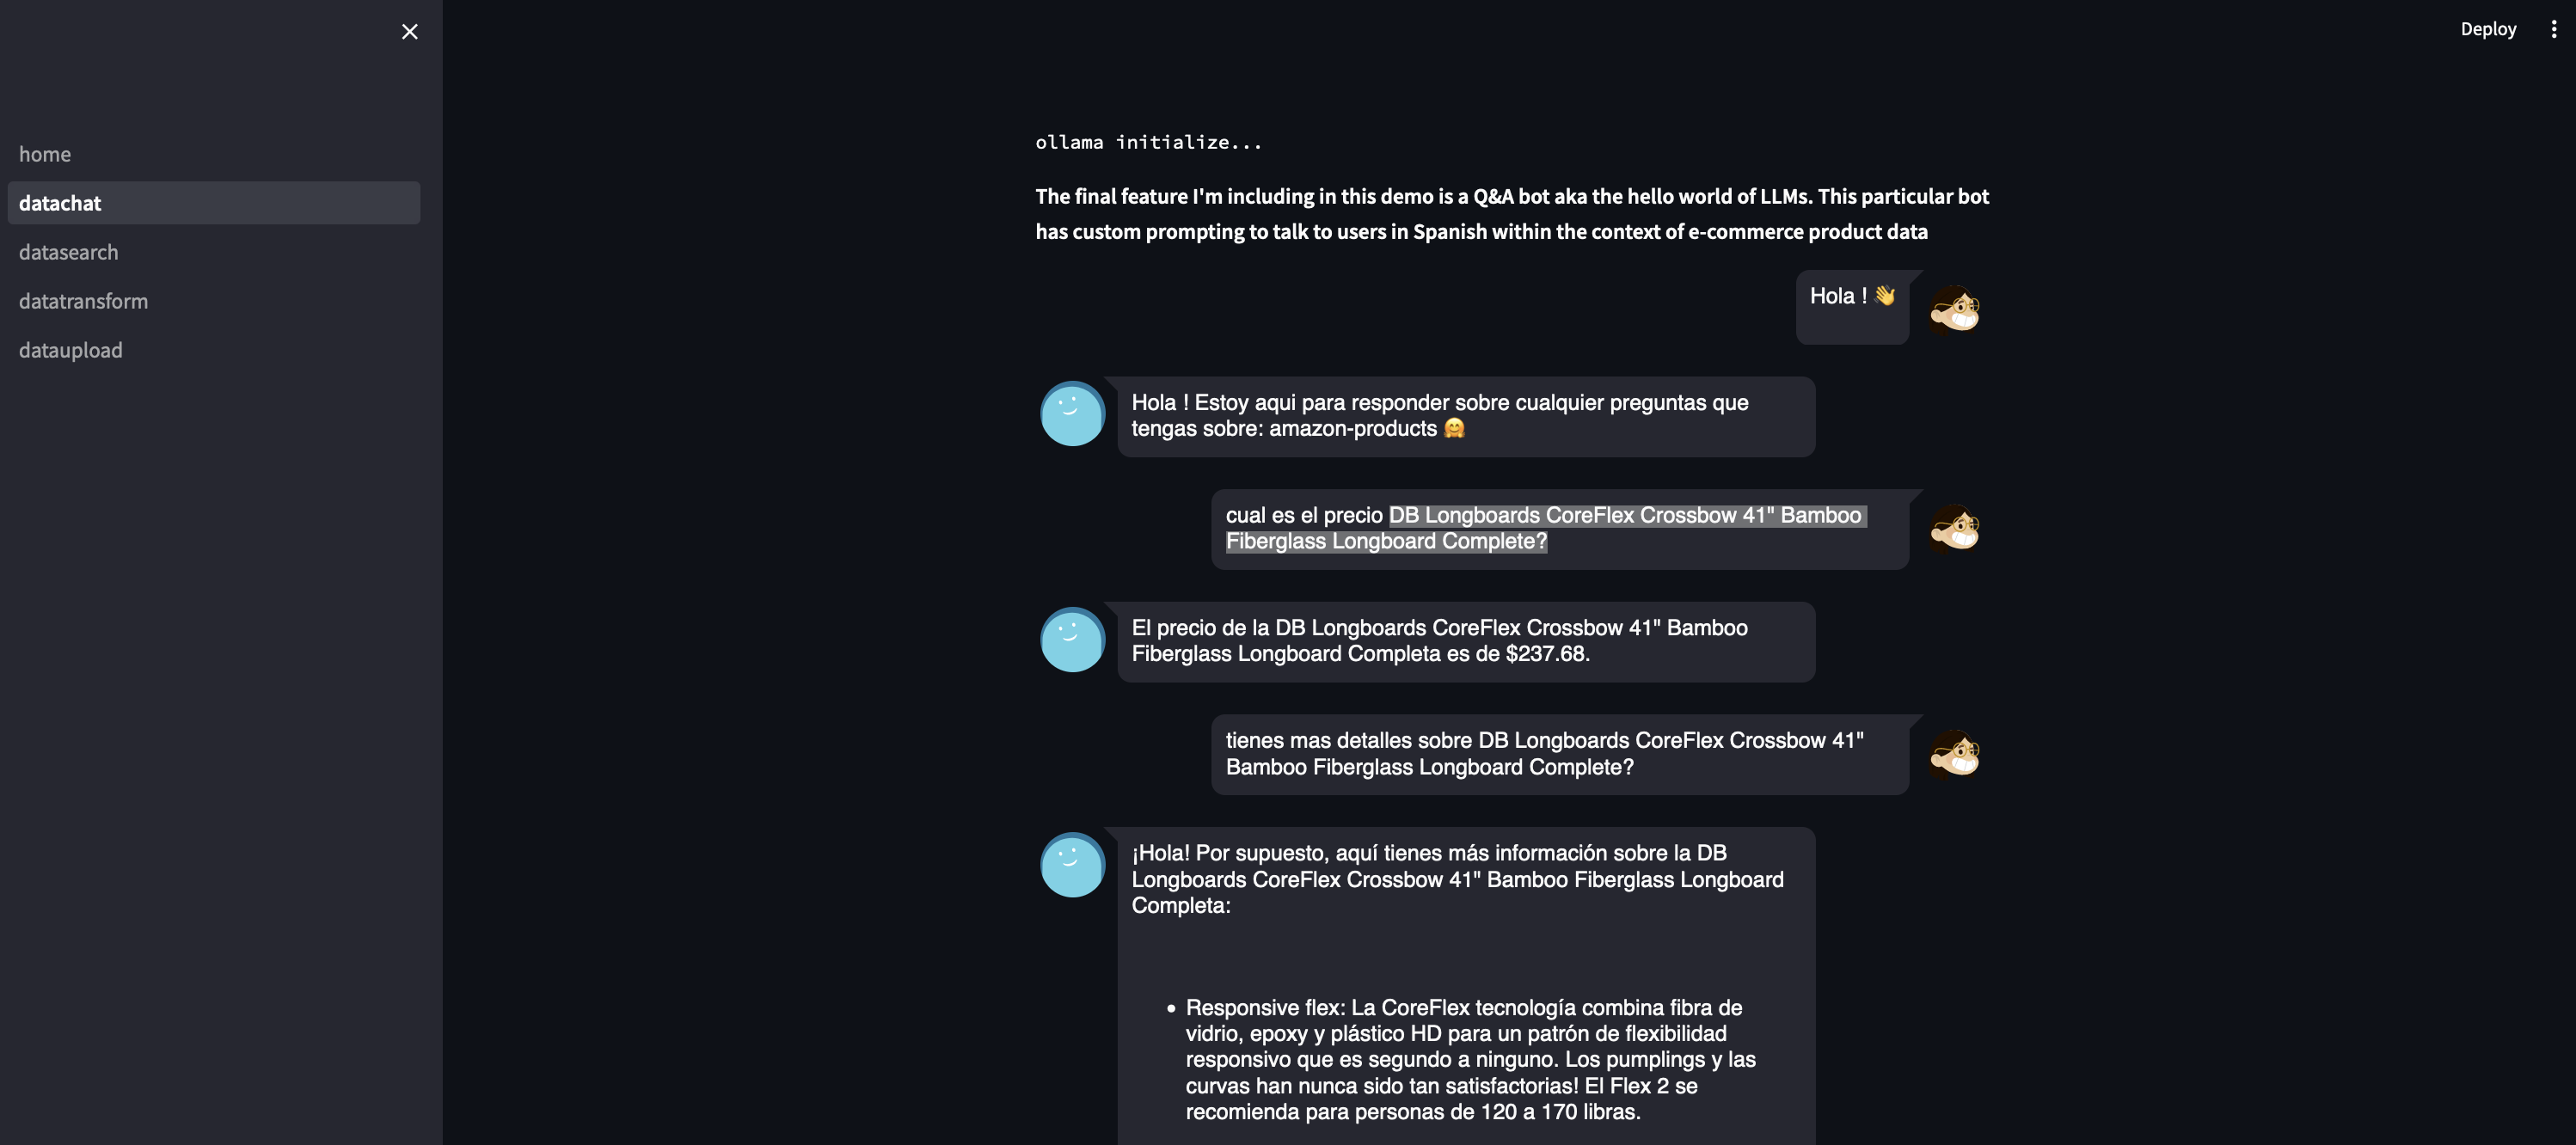
We can also chat over our data using llama-2 uncensored. This uncensored version basically has the guardrails off compared to the standard one. This allows us to get creative with our system prompts and avoid some of the more uhhh HR speak responses that the other version tends to throw out (“As an AI I cannot blah blah blah). The fun twist I’m throwing in here is that I am setting up the system prompt to force the model to respond in spanish. This obviously has inconsistent results compared to the more typical english scenarios, but I thought it was an interesting wrinkle to add to our case study and to explore more in depth the differences in quality of responses from the model.
Some of the better results can be seen in this chat:
And the code + prompts to get us to that stage can be found here:
Also before I forget, if you are having trouble with some of the functions referenced in the gists above, you can find them here:
Conclusion
Okay so uh congrats if you made it this far. You now have a (scaled down and local version) of an LLM based data pipeline. I’ve been getting really deep into this space lately (well deep for anyone without a phd) and find it incredibly interesting, commercial value aside. The aspects of this little case study that I found really valuable were all the different open source components that make up the whole end to end pipeline. Most of the documentation and examples out there of systems like these tend to use OpenAI from top to bottom, which can definitely start running up costs. Exploring these open source components has alleviated a little of my anxiety around vendor dependency // lock-in and I highly recommend that anyone attempting to launch LLM based systems consider using these options instead. You can find the full source code here, https://github.com/dverasc/semantic-search-app.
Things to extend:
- As you may have noticed, this entire project is built to run locally. So the next step would be to take this to a production type of config
- Qdrant does offer some more enterprisy deployment options, including Qdrant Cloud (https://qdrant.tech/documentation/cloud/), a SaaS version that gives you a managed instance of the db basically (note: I have not gone past reading their docs on this product so not sure how it performs. proceed accordingly)
- Ollama allowed us to run these open sourced models locally. this obviously does not work at any sort of scale. With that in mind, HuggingFace has offerings around open source models like Llama 2 + AWS BedRock and equivalent offerings at the hyperscalers also have Llama 2 options for deployment (note: again I have not gotten past the reading docs stage for these services so I can’t speak too much about how good they are in reality)